Revolve ST Flashcards
Basic knowledge (35 cards)
Product Features
How do I understand the order codes for revolve?
ST/US
Product Features
ST/US

Competitive Selling
With revolve, how do I know which needle guide to order?
ST
Competitive Selling
The adaptors are different for Legacy and Revolve. Make sure when setting up an evaluation that the correct adaptor is ordered prior to the start of the evaluation. The adaptors are ordered from Siemen’s.
ST
Clinical Interview Selling
Name one Key Item to remember with revolve and Siemen’s Inspiration and Inspiration Prime
ST
Clinical Interview Selling
All Stereo systems use the fork guide, except the GE upright system which use button.
ST
Product Features
Why is the advanced collection chamber a key feature of revolve®?
ST/US
Product Features
- Ease of tissue management
- Less handling of tissue/less crush artifact
- Separated tissue to correlate which sample has calcs
- Numbered tissue for pathology to identify samples with area of interest
ST/US
Product Features
Why would you adjust your vacuum when performing a biopsy?
ST/US
ST/US
Product Features
Decrease the vacuum:
- fatty breast
- avoiding structures like vessels or nipple
- avoiding implants
•Increase the vacuum:
- Dense breast or lesion
- Scattered calcs and need more tissue
ST/US
Product Features
Saline is important for what in revolve?
ST/US
Product Features
Saline is important for the transportation of the tissue through the shaft of the probe to the collection chamber.
ST/US
Product Features
How do you adjust the aperture on revolve?
Product Features
Touch the Variable aperture button upper left on screen and select the size. After selecting the size you must hit open/close to set the new aperture. (Note reset to full before deploying most clips)

Product Features
Advance to chamber 7 and Reset Chamber
ST/US
Product Features
- Select advance to chamber 7 when samples 1-5
- Select reset chamber when a new collection chamber is used
ST/US

Product Features
How do I remove the vacuum tube from the revolve control module?
ST/US
Product Features
ST/US

Product Features
2 ways to Load the probe with revolve
ST/US
Product Features
- Load the probe on the holder attached to the cart Note: do not arm the probe on the holder
- Load the probe with two hands (easiest when the probe and holster are held to the side) then arm and proceed
ST/US
Product Features
Initializing the probe with revolve
ST/US
Product Features
After loading the probe the Initialize probe button will appear on the screen select the button. After you select the button the probe will run through initialization in this order
- Cutter
- Collection chamber
- Vacuum (please note saline should flow to the Y connection)
ST/US
Product Features
Steps for meds through the stopcock with revolve
ST/US
Product Features
- Place the syringe on the stopcock
- Open the aperture
- Open the stopcock and begin pushing meds until fluid is in the lateral line
- Close front clamp
- Continue pushing meds
- Close the stopcock
- Open clamp
- Apply vacuum to clear the lines
- Resume procedure
ST/US
Product Features
Marker difficult to Deploy with revolve
ST/US
Product Features
- Is the aperture open
- Is variable aperture setting at full
- Is alignment correct for the probe and marker applicator
ST/US
Product Features
Revolve probe specs
ST
Product Features
ST

Product Features
Why is dual vacuum key in optimal core size
ST/US
Product Features
Dual vacuum allows for the tissue to fill the chamber while cutting. The lateral vacuum pulls in the tissue the entire length of the aperture. This gives a uniform contiguous sample without the tissue being cut off at the distal end.
ST/US
Product Features
Why would you choose different probe lengths with revolve?
ST
Product Features
- Probe length may depend on the ST table (ex: the Siemen’s Inspiration only uses 12 cm probes)
- Probe length can also vary depending on the breast thickness, a thicker breast may need a longer probe to allow depth access
ST
Product Features
What is the weld line and why is it significant?
ST/US
Product Features
- The account must understand that the weld line is not the start of the aperture in the patients breast.
- It is a good indicator if you are deep enough in the breast to start biopsy.
ST/US
Product Features
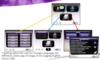
Changing Language and checking the error log.
ST/US
Product Features
ST/US
Product Features
How do you change the vacuum with revolve?
ST/US
Product Features
- Touch the vacuum button in the lower left of the screen
- Select appropriate vacuum level
- The vacuum will stay at that level until the power is shut off.
ST/US
Product Features
What is set view position and when to use it?
ST/US
Product Features
Set view position is the ability for the clinician to see a sample as they take a sample. When selected the sample is deposited into the next chamber and then the chamber rotates to show the sample selected. When the biopsy button is pressed for the next biopsy it rotates back to the next sample chamber.
ST/US
Product Features
Steps for biopsy with revolve
ST
Product Features
Once the probe is at post-fire within the breast.
- Biopsy is pressed on the input device (either hold or individual taps)
- Rotate the clock position as each sample is taken
- After sampling, press the vacuum quickly (quick tap) to clear the probe
- Press open/close to open the aperture
- Press SteadyVac
- Remove the cup from the probe (1/4 turn to remove the cup)
- Remove specimen’s and image
- If specimen okay shut off SteadyVac
- Place clip
- Put system in standby
ST
Product Features
How is the revolve armed and name two ways to disarm.
ST
Product Features
Arm the revolve by pressing the arm button on the active side of the holster.
To disarm the probe:
- press the safety button and then the fire button
- press the arm button to do a soft fire and slowly disarm.
ST
Product Features
Which side of the holster is active and how to change the active side?
ST
Product Features
The active side of the holster will have a blue light indicating it is active.
Press and hold the open/close button on the inactive side until the lights flash. Press the open/close button on the side of the holster that needs to be active.
ST
Product Features
Two ways to take a biopsy on revolve
ST/US
Product Features
- Tap the biopsy button and release
- Hold down the biopsy button for continuous biopsy
ST/US
